
© 1998-


My wife likes a clean, fresh smelling house, not one that smells and looks like the service department of a car dealership. And, although she has been more than a good sport about all this restoration stuff, she does have her limits. So, anything I can do to keep the Falcon project out of both her indoor life and her daily life in general, the better it will be for me and my car as the project wears on much longer than I originally told her it would. In addition, since restoring a car is a long term commitment I don't want to get tired of the project or frustrated at having to spend a lot of work time in a dark and/or dirty place. This web page is dedicated to helping you make your restoration(s) or car project(s) as fun and enjoyable as possible while also limiting the intrusion such projects can make into your daily life. The following materials and comments are based on both my frustrations and good experiences while restoring my '64 Sprint. I will present many ideas and suggestions for both optimizing what you have as well as improving the design of a new home's garage/workshop. The ideas I discuss and show in illustration are only a few of the many ways there are to optimize workspace in a residential setting. This web page and the suggestions herein are really intended to stimulate your thinking to improve your individual circumstances, rather than dictate exact ways of organizing workspace.
Whether you just do occasional minor work such as oil changes and tune ups, moderate
work such as a full brake job, major work such as overhauling an engine/transmission,
or long term major work such as restoring a car from-
This Web page will discuss garage and workshop organization from the viewpoint of
undertaking a full from-
Workspace Considerations
No matter what workspace design you have or would like to have, there are several components that are common to any workshop/workspace so we will take a moment here to discuss them prior to getting into different categories of workspaces. These are the things that make the most difference between a dirty, dingy place to work, and a clean, bright, comfortable place to work. These items, in my opinion, impact the enjoyment of a long term project (or even multiple shorter projects) much more than size or even efficiency of design. They are covered below in no particular order.
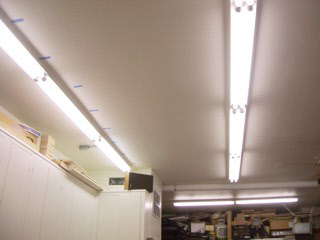
- Lighting: Make sure you have plenty of adequate bright lighting. Fluorescent is the most common and the easiest, but it can be expensive if you have a large workshop. To limit the cost I chose four foot shop light fixtures I got from a home improvement store. They are usually around $7 to $8 a piece which makes the cost of eight feet of fluorescent lighting around $15. If you purchase eight foot fixtures expect to pay $30 to $40 a piece. Most of the four foot shop lights are also quieter (most come with ballasts that have an "A" sound rating, while most standard fluorescent fixtures have a "C" sound rating and have a distinctive hum). These shop lights also usually come assembled with a short cord to plug it in. You can either add outlets in your ceiling (one standard duplex outlet for two shop lights), or you can remove the cords and hard wire them together or have your electrician do it for you. Thirty two feet of lighting is just adequate for a two car garage set up in two rows of 16' (to save you the simple math, that equates to four eight foot fixtures, or eight four foot shop lights). I used more than this anount, adding another strip above the workbench and a few over the power tools. You make the call, but great lighting will make your work much more enjoyable.
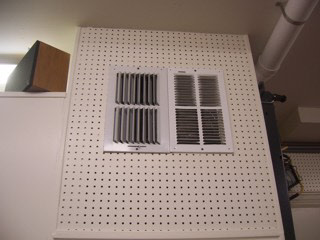
- Insulation/Heat/Air Conditioning: If you live in southern California near the ocean,
I wouldn't bother with any of this. Just about anywhere else I would recommend doing
some or all, especially in areas of extreme climates. I live in the Dallas/Ft. Worth
area in Texas, and while the winters are generally mild enough, the summers can be
brutal. Air conditioning is essential six to seven months of the year here, and heat
can be welcome two to three additional months of the year. You must decide what you
are willing to deal with, but working in a comfortable temperature is much more enjoyable
than sweating in the summer and piling on coats & gloves to work in the winter. If
you are working in a well insulated two-
car garage, a window air conditioning/heating unit may be enough if your climate is not too severe. If you add on a small to large workshop, I recommend a standard installed system with ducting and vents in the walls/ceiling, and suggest making it all- electric so that you do not need to worry as much about a pilot light and gasoline fumes (you should not use even an all- electric furnace around flammable liquids & vapors, but all electric is far safer if you should have an accidental spill in the shop/garage). I also recommend not adding your workshop (or garage) onto your existing home heating/air conditioning system since one way or another you will end up generating a lot of smells in the course of your work that you probably do not want circulating in your living space. If you have not built yet, I recommend getting an insulated garage door. If your existing door is not insulated, you can purchase insulating kits for them. Be sure to get a weather- strip kit for the garage door too, and make sure any door(s) into the living space are well weather- stripped and sealed. In some areas of the country, a well insulated garage and workshop can get you by without heat or air conditioning. The majority however will benefit by adding heat and/or air conditioning. In the desert southwest, a swamp cooler will be adequate for comfort, but will also add quite a bit of humidity so be aware of this when working with bare cast iron or steel parts such as engine blocks or heads since they will begin to rust with even this amount of humidity in the air. The same is true in the deep south, midwest, and eastern seaboard states in the summer without refrigeration air conditioning to help lower the humidity in the work area.
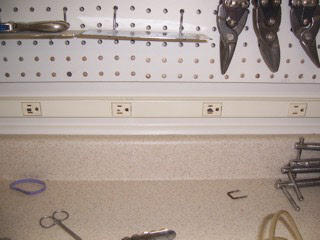
- Electrical Outlets & Circuits: I almost can't say enough about having plenty of outlets
and circuits. In a standard garage, outlets are generally around 42" above the floor,
and there are usually only one or two. However, having a handy outlet means not needing
to get an extension cord. This not only adds to convenience, but it also adds to
keeping the shop cleaner & more organized, while adding to safety by not having cords
to trip on and get in the way. I plan to add a pull-
down/retratable cord in my ceiling in the not too far distant future. I recommend two circuits for outlets, one for lighting, and, if you can, a 220 volt outlet for a welder or other future item. If your garage is presently not sheet rocked, it will be relatively easy to add whatever circuits for lighting & outlets as you need/want. If your garage is already sheet rocked but not insulated and you plan to remove the sheet rock to insulate, you can add the wiring then. If it is both insulated and sheet rocked, you may find it easiest to simply run new electrical lines in conduit or Wiremold on the surface. If you install regular outlets, I recommend three on each wall at a minimum, with several at a workbench. As seen in the left photo above, I installed 2 gang boxes with two duplex outlets in each. The left outlet is on one circuit, and the right outlet is on a second circuit. I have two of these double gange/dual duplex outlets on each wall. As an alternative, there is a device called Plugmold which is a strip about an inch or so wide and has outlets every so often and mounts on the surface of a wall or bench. It comes in many lengths from two feet to over 10 feet. You can order it with outlets every two feet, every foot, or every six inches, and they can be ordered with one, two or three circuits in each. For my workbench areas, I chose the every six inch Plugmold with two circuits in each, with the circuits alternating between outlets (circuit A in the first outlet, circuit B in the second, circuit A in the third, and so on). Note that the dual or triple circuit Plugmold can be hard to find and may need to be special ordered. It can be manually rewired quite easily if you know what you are doing. In the right photo above you may see a black dot on a couple of outlets. This identifies which outlets are on circuit A and the outlets with not black dot are on circuit B. The reason for this is if you have a fairly high-draw item pluged in to circuit A on the other end of the workbench and you wish to use another high- draw item like a heat gun on the other, it is easy to make sure you plug it into an outlet without a dot, avoiding an overload.For the garage, I chose to install standard outlets in the walls.
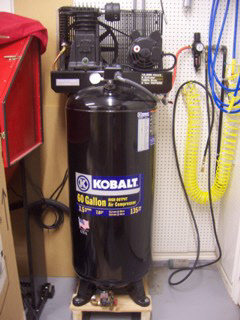
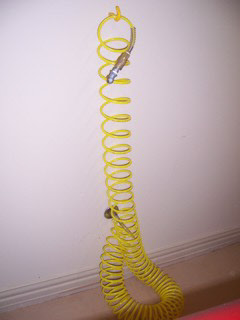
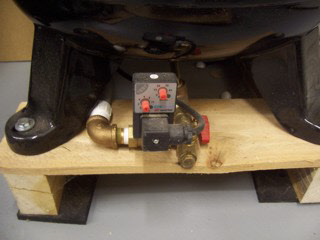
- Compressed Air: My present compressor is in the top left photo. I had a smaller roll
about 20 gallon unit in our last house. Unfortunately, it just didn’t have enough
umph and airflow for the media blasting cabinet to function properly. I’d chosen
a portable unit in case I ever wanted to take it somewhere on a distant project.
But I never took it anywhere, it just sat in the same place energized all the time.
I figured a stationary compressor would be a better fit for my shop this time around.
This compressor is a high output model and the media cabinet is a different cabinet
with this compressor. I can’t believe I wasted all that time blasting off old rust
a slowly as molasses. Now my blasting cabinet is fast! Since I’d planned on this
being a stationary unit I decided that a 220 volt requirement was okay. When we were
building our last home I had the plumber add several lines of "black" steel pipes
in the workshop and garage during construction and then I later hooked up the air
compressor to the lines. In our present home I rented an electric threading machine
and did the piping myself. I'd thought that just having the compressor in the shop
or garage with a hose would be sufficient, but having air plumbed to several locations
in the garage & shop has been truly wonderful. I never figured that it would be such
a convenience to have compressed air nearly at my finger tips. Even my wife congratulates
me on that decision since she can check/fill the tires on her car herself right at
home in the garage (see top right photo above). She blows up the kids inflatable
toys for the pool, and blows off her wheat grinder after making flour. It seems I
use compressed air for almost everything when working on a car project, from blowing
off parts I've had in the solvent tank, to filling tires, to painting, and almost
everything in-
between. Adding pipe in the walls if the sheet rock is off is fairly easy and not too expensive. Our plumber only charged me about $250 to add pipe with seven outlets stubbed out the wall (I added the quick disconnects myself after we moved in). These pipes can also be added on the surface if necessary. Avoid the temptation of using plastic PVC pipe. Eventually it will burst somewhere and can cause serious injury. If you plan to leave the compressor hooked up to a central pipe manifold and and have it energized 24/7 you will want to invest in some sort of an automatic drain (see the lower mid photo above). I made the mistake once of leaving my old compressor energized and under pressure without draining it for several months. When I did drain it I got over two gallons of somewhat thick rusty fluid out of it. Obviously, that tank was ruined and dangerous to pressurize again. Automatic drains fit where the drain plug goes, hook to an electrical source (either 110 vac or 220 vac), and have a selection of frequency to open the drain as well as time duration the drain valve is open (shop around here as there are many choices with varying features). Ideal for me is draining once a day for one to two seconds. Most have a test or manual operation button on the face of the control (it’s in the top left of the control in the bottom mid photo above) so when I am using the compressor all day I can manually drain it as often as I want with a touch of a button.
- Floor Paint: This is another area I can't say too much in praise of. Having done
a lot of work in the driveway in past years, I can attest to both the desirability
and practicality of a painted or well sealed floor. First, a painted floor looks
much nicer -
- makes you feel more like you are in a professional shop. Two, it is easier to clean up spills as well as dust & dirt. Thirdly, if you choose a lighter color it makes your shop brighter and increases the overall desirability of working in it. In addition, it protects the floor better from oil soaking in and from stains. There are all types of floor paint. Some will eventually "pull up" when hot tires have been sitting on the paint repeatedly. Others will simply start peeling after some time. Epoxy paints tend to be the best. The real trick to getting a long- lasting floor paint job is in the preparation. Unless it is a brand new floor, it takes a great deal more to prep than simply sweeping or hosing it off. If you choose to do it yourself, make sure you follow the directions for floor preparation, don't shortcut the process. You must get as much oil & grease out of the concrete as possible before anything else. Sever commercial products are available to do this (check with a janitorial supply house). A pressure washer also works well, especially if it is a heated one with some sort of soap. Most will call for the floor to be “etched” with acid. This sounds sinister and dangerous, but really you do this with the same acid you use in swimming pools. You can find it at any swimming pool supply place. Follow the directions in the paint instructions for acid strength (you will need to dilute the acid- - usually in a five gallon bucket) to way below the full strength in the bottle so even if you get some of the dilution on your skin a quick rinse is all that’s needed. When you pour the acid dilution on the bare concrete it will begin to foam as the acid reacts with the alkaline base of the concrete. This eats away a small layer off the top of the floor and roughs up the surface much like sanding (some companies who do this professionally actually do sand the floor instead of the acid etch). This not only cleans the floor, but gives the paint a lot more surface area to adhere to. Also, as the acid reacts with the alkaline base in the concrete it neutralizes the acid so when you hose it off after the etch it is not environmentally hazardous and can even get on your lawn with hurting it. There are several companies that will paint your floor professionally (at a fairly high cost) but they will also warrantee it. On a final note here, not only will a painted floor make the restoration project go smoother, but after the project is done a painted floor makes daily life more enjoyable since you can still clean up better and easier. And the garage will always look better, which will help make you feel better going in and out of it each day, as well as when you work in the garage/shop for years to come.
- Work Bench: This is where you will be doing much of your work. Make it as nice and
easy to use and as practical as you can. Remember that you will be forced to use
it for large dirty items (intake manifolds, oil pans, etc.), small clean items (carburetors,
distributors, etc.), as well as items like upholstery, so cover it with a washable/cleanable
covering such as Formica or other laminate so you can clean it off after one project
before you start the next. Make sure it is big enough that you can fit any of your
projects onto it, or to store items in progress while you start on others. A ten
foot workbench is not impractical if you have the space. Have some extra lighting
over the bench, as well as plenty of electrical outlets and a compressed air outlet
(if you have compressed air in your shop). Some drawers are a nice addition on one
end of the workbench, but be sure to keep a good portion open under the workbench
so you can use a chair or stool to sit at the bench like you do at a table (this
is important for projects that take more than a few minutes -
- standing for long periods of time is very fatiguing). If you have a long, open underneath counter, make sure you secure under the counter well. I have a nine foot span under mine. I laminated five nine foot long 2x4’s together (just glued and screwed then together) and mounted the new “laminated beam” sideways under the front of the counter top, secured well on both sides. I can stand on my counter in the middle and jump up and down with no movement of the countertop. I recommend getting a chair or stool of some kind on wheels so you can slide in and out, and from side to side when working on long (in length) projects. Cabinets above the workbench are nice too, but these can also be a hindrance to using table- top tools such as a table- top drill press or a table- top belt sander, etc. You might give consideration to two smaller workbenches, one for tools which will get fairly dirty with use (grit from using a grinder, or metal shavings/wood chips from a drill press, etc.) and one for working on projects that you can keep relatively clean. This way you can be working on a carburetor for example on the workbench, and take a part over to the grinder on another bench and not worry about getting gritty stuff in the carb. Another consideration, especially if you have a larger work area, is using an old table as a workbench. The advantage to this is that you can have a project in the middle of the table and still get at it from all sides (a chair or stool on wheels is really valuable here). I have such a table in my shop and it has been indispensable (many of the photos on other editions of this web site show projects in progress on this table, which sits in the middle of the shop). I recommend an older one that you won't worry about damaging, and if you can find one covered with a smooth Formica type covering you'll be better off. Finally here, if you will be doing a lot of work on greasy heavy items like transmissions, heads, differentials, etc., you may want to look at covering the surface of the bench with a heavier gauge stainless steel (or galvanized steel of the cost of stainless is too high for your budget). Professional shops have this on their workbenches. It is easy to clean, and most importantly it is very durable and not as subject to damage as heavy metal items are set down and moved around as Formica is. If you will only occasionally do this sort of work a Formica covering will do fine, just remember to be careful with the heavy metal items.
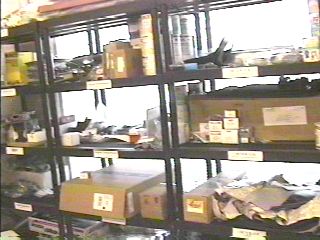
- Storage Shelves: As mentioned in the Getting Started edition, if doing a restoration,
these are absolutely necessary if you are to maintain some form of sanity and organization
during the project. These shelves can be anything from purchased metal or plastic
shelves, to built-
in ones made of 2x4's and plywood (if you build them out of wood I recommend painting the wood and/or covering the plywood with a laminate so oil spills can be wiped up rather than soaking into the wood and getting other parts oily, as well as the unsightly aspects of dirty greasy bare wood). You may choose to pick a whole wall and fill it with shelves, or have a couple of areas of shelves. Label them in a way that makes sense to you so you can easily locate parts. One set of shelves for smaller clean parts, and one set (larger shelves with more space in between each shelf) for larger dirty items, and items waiting to be refurbished makes a lot of sense too.
- Shop Sink: Having a sink in the garage has been far nicer than I ever dreamed it
would be. The standard shop sink is made of fiberglass and is self supporting by
its own legs as seen in the photo above. It is deep and makes clean up a snap. Put
a bar of Lava soap and a scrubbing brush there too. Also put a paper towel holder
up next to it. You'll wonder what you ever did without it. (Sorry about the messy
floor-
- was in the middle of a project when I took this photo.)
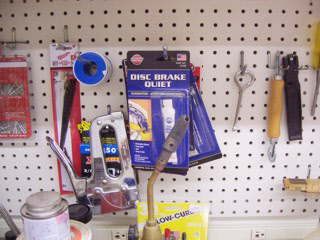
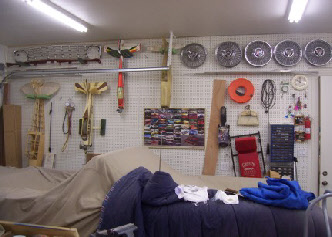
- Peg Board: Peg board is a truly wonderful invention and can dramatically improve workshop/garage organization. I covered most of the walls in my workshop with peg board, on top of the sheet rock (spaced out ¾” so the “peg” hardware can have space behind the holes), and painted it the same white as the rest of the shop. Painting it makes a great difference too in the brightness of the workspace. Peg board above the workbench area is almost mandatory (left photo above). I even put it up behind my free standing tools so I could make use of otherwise wasted wall space. I hang everything on the peg board from extension cords and bar clamps, to timing lights and hot glue guns, parts waiting to be installed on the Falcon, my radio control airplanes, fire extinguisher, creeper, and just about everything else.
- Finished Walls: Finally, fully insulated walls are only half the job if they are
not also covered and painted. Sheet rocked & painted walls are not only nicer to
look at, but they seem to keep down the cob webs, and any liquid splashes are easily
cleaned up. They also protect the insulation from being easily damaged or torn. In
addition, a light colored paint will also help in making the workspace brighter and
cheerier to work in. Make sure, however, that you use a semi-
gloss enamel rather than a flat or eggshell/satin finish. A workshop will see use and abuse at times, and a semi- :-gloss enamel (even a latex or acrylic enamel) will be far more durable than other finishes> Lastly, finished walls give you a place to add all those wonderful Falcon posters you have. )
Optimizing
Your
Workspace
Discussion
Part 1


This is the end of the Optimizing Your Workspace Edition Part 1
Part 1

Feel free to save this page to your computer for your personal use and future reference-
If you have comments or suggestions, email me at joe@joesfalcon.com