
© 1998-


The key to an enjoyable and successful restoration project (or even just a moderate
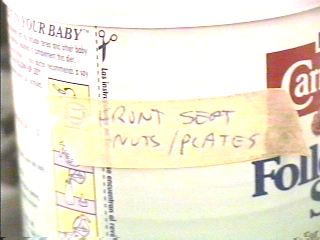
to major repair project) is organization! As I removed items, I put any screws or
bolts, nuts, washers, brackets, etc., that went with that item, into a separate container
and labeled it with masking tape and wrote a detailed description of what was in
the can (i.e. "Screws & nuts that hold on rear Sprint V8 Panel.", or, "Screws, nuts
& clips that hold on plastic trim on dash.", or, "Screws, nuts, bolts, brackets & all
hardware for radio."). I mostly used baby formula cans that had been rinsed out & dried-


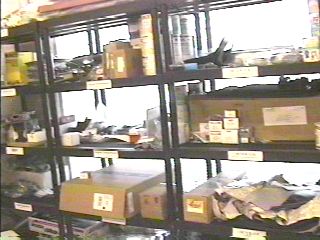
Shelves are really a necessity. Inexpensive used metal ones can be found at resale
places like Goodwill for $5 to $10 a piece. New deeper plastic ones will run about
$50 a set (I chose these because they hold more). Try to keep parts from the same
location together (i.e. everything from under the dash on one set of shelves, along
with the cans containing the nuts & bolts removed from this area). I found labeling
the shelves helpful -
Some thoughts on tools & equipment. I can't say enough on this one point: You can't beat having the right tool for the job! However, budgets as they are (people restoring Falcons range from high school kids to retired CEO's) you must look at what you can swing to do your project. Here are some things I found almost invaluable: A media blasting cabinet, a parts washer with solvent, an engine stand, and an engine hoist. Engine hoists are available for rent for around $30/day and new ones cost around $220, so unless you plan to move your engine/transmission often or do a lot of engine work, you are better off renting. Engine stands however only cost around $75 and rent for around $25/week, so if you figure your total engine rebuild will take longer than two weeks, you would be better off to buy one.
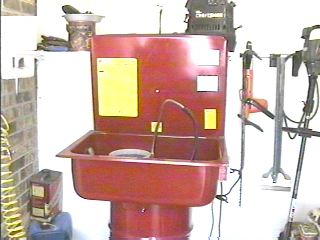
A solvent parts washer, such as the one seen above, is all but mandatory. They cost about $200 at Sam's Club, Costco, etc., and Safety Kleen will fill it for around $130 (which also includes taking away the used stuff when you are done). I haven't seen these for rent. You can also get a few gallons of parts wash at the local auto parts store and pour it in a wash tub and use that if you can do all you parts in a short period of time. However, if you can swing it, a motorized parts washer is far superior. The downside is the fumes. If you are doing your restoration in a garage, the fumes will permeate your other car(s) and to some degree your house if the garage is attached. Putting it in a shed in the back yard is a better solution.
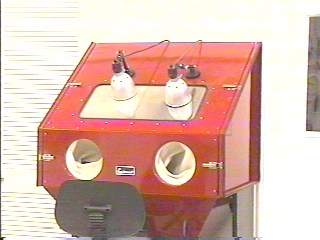
Media blasting cabinets, such as the one seen above, are not cheap either. But, for a "from the ground up" restoration, it is so close to necessary that I’ll state it is necessary. I got mine from Eastwood Co. There are less expensive ones available at all the big swap meets (most of them are a modified 55 gallon drum on legs so you can get an idea of the size). I just liked the size and features of this model (although I did have to assemble it myself). All cabinets have some kind of a hookup for a shop vacuum or other dust removal system, and they are fully enclosed so as to keep dust under control. Other blasting options include pressure blasters, and simple siphon feed out of a bucket, both with no cabinet. Obviously, the latter two need to be used outdoors if you value your lungs, but they do have the advantage of being able to blast the frame of your car or other parts that are too big to fit in a cabinet.
Let's Get To The Car!
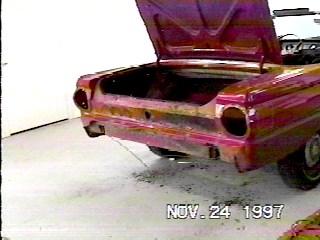
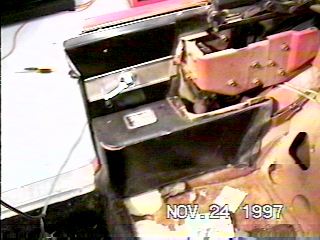
The first thing I did was remove all the chrome & trim from the car. I then started on the back end and removed one item after another. The above photo shows the rear end after the tail lights, trim & bumper have been removed. The bumper was extremely difficult to get off due to rust.
This is the trunk with the gas tank removed. The wire going down the side (on the floor of the trunk just to the left of the opening) is really the wire for the fuel quantity sender just moved from its original routing which would be just in front of the opening for the gas tank, through a hole, and then connected to the sender. This wire joins the bundle coming from under the dash, and splits just prior to the wheelhousing.
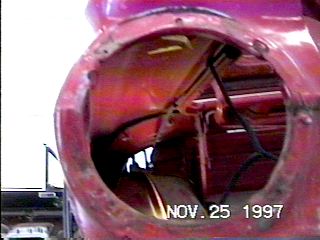

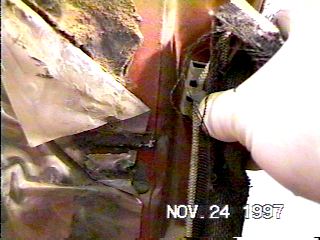
The left photos is looking through the left tail light at the wiring harness location.
The one on the right is a close-
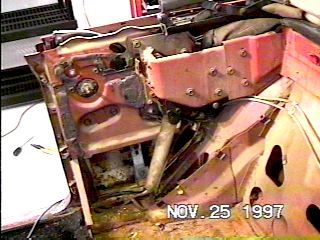
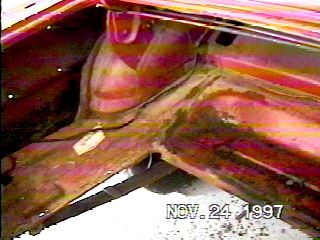
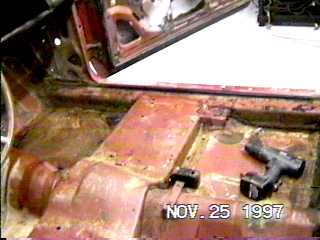
The right rear of the interior. The left with the upper portion of the quarter trim removed, the right also has the bottom quarter, the "door trim" and upper painted trim piece removed. Note the location of the hydraulic lines for the convertible top, and the hydraulic actuator for the top in the bottom center of the right picture. This actuator is only connected at the top, You can also see some of the window mechanism, but windows will be covered in another edition.
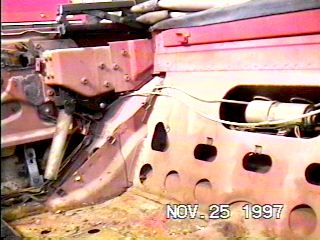
This is the same area discussed above, only shot from a lower angle. (Note the rust on the floor.)
Although not the best shot, this is looking at the left backseat area where the drivers door latches to the frame. It shows the attachment of the windlace behind the drivers door. By my thumb, you can see a clip. There are three of these. To remove the windlace, pry back the sharp points, remove the lace. To replace, reverse. Note also the thick plastic (to the left of the windlace) that is also on the doors when you remove the door panels. It is held in place and sealed with a very thick & sticky putty like material called strip caulk which is available at most Falcon parts suppliers.
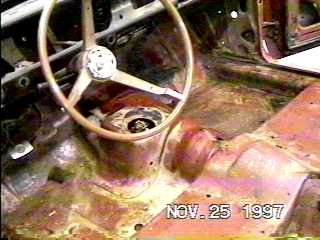
This is the floor with everything removed. Convertibles have a front seat support
which is the raised section and provides additional structural strength. Notice also
the "Inner" rockers special to convertibles. On the right photo, you can see two
small extensions from the seat support going toward the rear of the car-
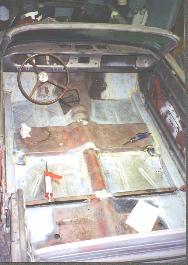
This photo shows the same area as discussed above after replacement of floor pans & inner rockers. The front seat support was removed while the new floor pans were installed and then welded back down. The inner rockers are new '65 Mustang Inners. They are about 1/4" less wide than the originals (which worked out okay since the floorpans were being replaced anyway and the extra ¼” needed was available in the new pans). The Mustang inner rocker panels also have a 45 degree taper in the top inside instead of the rounded tops on the originals. The car also needed new torque boxes which came from a parts car. They are under the front angled portion of the floor pans and the other side are directgly behind the front wheels.
This is the end of the Getting Started Edition
Getting
Started
Organization & Initial Dismantling

Feel free to save this page to your computer for your personal use and future reference-
If you have comments or suggestions, email me at joe@joesfalcon.com