
© 1998-


For Christmas one year my wife bought me Eastwood's “Hot Coat” system which coats metal parts with a plastic powder and then the powder is baked onto the part, otherwise known as Powder Coating. I waited a while before trying it mostly due to not wanting to spend the time to read up on it and learn what to do, plus I didn't have an oven to use for the curing of the powder. I wish now I had tried it out Christmas night. Several folks on the TFFN Falcon discussion group have been tossing around getting the system, and since I had one I thought I'd give it a try and pass along my impressions. In addition I did have a part that I felt would be best finished by a powder coat process, so that also played into the decision to give it a whirl sooner rather than later. I won't attempt to give an exhaustive description of the operation of the system here since that is well covered in the operating instructions. This page is simply meant to give others an idea of what the system does, what is required to use the system, and my impressions of its overall ease of use.
To start off, the system is very straight forward and easy to use. The results are truly professional. However, to use the system, the metal you are coating must be completely stripped to bare metal, it must be small enough to fit in whatever oven you can come up with to use, and the part must be able to withstand 450 degrees for five to 10 minutes, and then 400 degrees for 20 minutes.
Parts can be stripped with a chemical paint and/or rust remover, or they can be abrasively blasted in a blasting cabinet. I don't recommend hand sanding since the curing powder actually turns liquid and flows into every nook and cranny of the part, and sanding marks will show very prominently. If a part is going to be painted, especially with a rust converting primer, it is acceptable to abrasive blast the paint and the majority of the rust, but if there are a few rust pits left, you know it will be okay. However, if you are going to hot coat the part, every spec of paint, rust, and any other contaminant must be removed. This must be taken into consideration before you buy the system. If there are surface imperfections, Eastwood does have a filler that will work with the powder coating system to give a nice looking finish.
Obtaining an appropriate oven is another challenge. For small parts (truly small,
less than six inches long and three inches high) a toaster oven works well and that
is what I used for the parts shown herein. A standard household oven (electric not
gas) works well for parts that are a bit larger, but even that size oven is somewhat
limiting. The ideal oven would be large enough to fit a rear axle housing, but such
ovens are hard to come by, hard to accommodate in most home workshops or garages,
and most likely very expensive (unless you can find one at a surplus sale). Eastwood
does have an infrared curing system which is like a radiant space heater on a stand,
but it is quite expensive (around $450). The oven you choose, according to the instructions
from Eastwood, must never again be used for food preparation since some sort of substance
emits from the powder during curing which could later poison food in the oven. However,
it usually is not difficult to find an old used stove or built-
Finally, consider the parts you wish to powder coat. Heavy cast items or smaller parts made of sheet metal with a lot of bends will probably withstand the curing process fine. Long straight pieces of thinner or soft metal will have a tendency to warp with the heat. If you plan to powder coat these parts, you may want to get some of the same parts that are old and not in good shape and put them in the oven at the required temperatures for the required amount of time as a test before you try it with the real parts.
Several people who work with powder coatings in the commercial trade have emailed
me recently and told me they cure their coatings at lower temperatures than Eastwood
says to use on their coatings. I assume Eastwood is using different materials in
their powders since their instructions say to put the coated part(s) into a preheated
450 degree oven for approximately five to 10 minutes then 400 degrees for 20 minutes
(the actual instructions say to put the part in the 450 degree oven till the coating
gets glossy and then completely flows across the entire surface of the part -
Using the system is fast and easy. I timed it. From the time the part was ready for coating (completely stripped and cleaned) till I was done was 25 minutes (this included getting the system out, plugged into the air and electrical outlet, attaching the bottle with the proper powder, coating the part, putting the part in the preheated oven, cleaning out the gun with compressed air, and putting everything away). After the cure you turn the oven off, crack the door and let the part cool to room temperature. The part is then ready to be handled and returned to service. Cooling takes about 10 to 30 minutes depending on the size, density and material of the part. The time from when a part is stripped and ready for coating till it is ready to reinstall is around one hour. Tough to find a paint that dries completely in that amount of time. Plus powder coating is usually far more durable than most paints, not to mention more attractive. Some coatings (such as Eastwood's "Almost Chrome") require two coats; the metallic coat which is cured in the oven and cooled, and then a clear coat (that is also cured & cooled). This clear (or translucent) coat keeps the metals in the base coat from oxidizing. Others, like the translucents, require a shiny base coat, like almost chrome, then the translucent color coat.
Eastwood states that the powder gun needs 5 to 10 psi with 8 psi being ideal. My
air compressor has a regulator but it only really goes down to 20 psi and then zero.
I decided to put it in-
At the time of this writing, Eastwood offered the hot coat system as a basic system
or as a deluxe system. The deluxe system includes everything in the basic system
plus some additional things like silicon plugs, high temp masking tape, extra powder
cups, safety wire, etc., and the group package saves some money over purchasing everything
separate. I have the deluxe system. They also offer a "high performance" kit to supplement
either the basic system or the deluxe system. Unfortunately, the high performance
kit is so close to absolutely necessary that it really should be part of the basic
system. There is a deflector on the front of the gun. The one that comes with the
basic system is really designed for applying powder to inside corners and hard to
get to areas rather than for most coating jobs. To get the right deflector you need
to order the high performance kit. It seems this should be the opposite. In the high
performance kit you get the right deflectors, and more powder cups. Cost of the system
is not cheap. The basic system is around $150 and the deluxe system is around $200.
The high performance kit is around $20. The mini regulator is around $30. Add all
these things up and it is easy to see that for the same money you can buy a lot of
cans of spray paint. However, powder coating is far superior to paint in terms of
durability and protection, and in most instances it looks much better. Each can of
Eastwood’s powder is around $10 to $16 depending on the color, and it is equivalent
in coverage to 2-
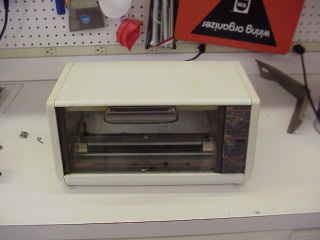
This is the toaster oven I got specifically for powder coating. I got it for $5 from a local thrift shop.
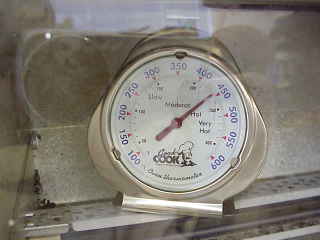
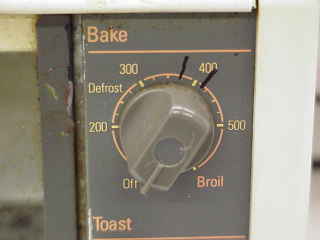
Be sure to check the actual temperature of the oven with an over thermometer rather than relying on the temp selector. It seems the temps needed for proper curing are within a small tolerance. The photo on the right shows markings I put on the temp selector for 450 degrees and 400 degrees as I read on the oven thermometer (after letting it set for a while to make sure it was at a stable temperature). Note that the actual oven temps were about 25 degrees warmer than the oven temp selector said they should have been.
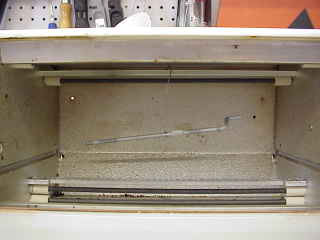
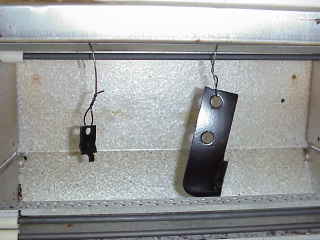
Be sure to check fit of the part, and practice inserting it in the oven several times before coating it so you take less risk of damaging the coating before curing. In an oven this small it can be a challenge to not ruin the coating so take extra care. In this photo you can see I supported this part with one wire which was wrapped tightly around the part. As a result there is a thin line around the part where there is no powder coating and bare metal is exposed. This can simply be touched up with regular paint. In this case, I wish I had used two wires just loosely supporting the part since the amount of uncoated area would be minimal. However, this portion of the part is not seen once installed so touching it up with paint will provide adequate protection from corrosion without detracting from its good looks. How you support the part you are coating can make a difference in the quality of the final finish. Pick a spot that is not seen later to support it with wire, or support the part by using silicon plugs on bolt holes.
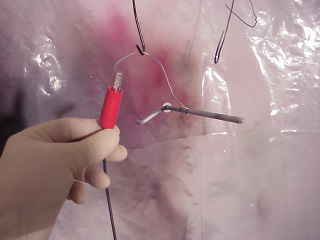
The best place I found to ground the part is to attach the grounding clip to the wire that is holding the part. The wire I used was the stainless steel safety wire included in the deluxe system. I think this is a good choice since the wire is clean and won't contaminate the surface of the part. It is also very thin yet very strong so it has less impact on the powder coat, and you can still support heavy items.
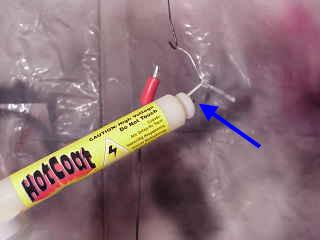
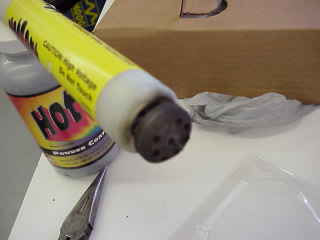
This shows the powder application gun tip pointing at the part to be coated. The blue arrow points to the emitter. This is charged with high voltage (low amperage) like a spark plug. It is not designed to actually spark, just to charge the powder so it is attracted to the grounded part, and it works well. As the powder leaves the gun, it almost seems to jump onto the part. Very little of the powder seems to be wasted, although the manual says to get a good "cloud" of powder around the part, and some does eventually fall to the floor. You need to be careful not to get the emitter too close to the part or it will result in a good spark jumping from the emitter to the part. Eastwood claims that, even though the powder is not flammable like paint fumes, the powder can be ignited when airborne by a spark or open flame, much the same as wheat flour dust can ignite in a granary. I did accidentally make a couple of sparks during the coating process so be careful. I did try to coat a small part by dipping it in the can of powder but the powder just fell right back off the part and didn't stick to it at all. It really needs the electrical attraction for the powder to adhere to the part long enough for it to cure.
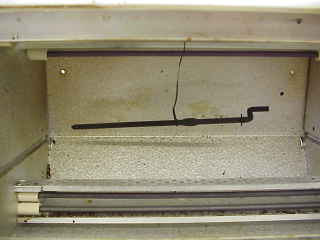
This is after the part was coated and is in the preheated 450 degree oven. When applied, the powder is dull and grainy looking. After inserting the part in the oven the powder quickly begins to get glossy (after just a few seconds) and flows on the part shortly after. As mentioned above, after the powder is completely liquefied and has smoothly flowed over the entire part, temperature is reduced to 400 degrees for 20 minutes.
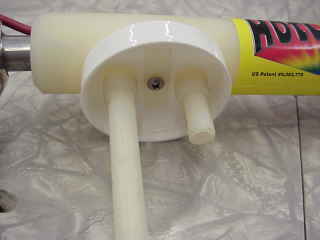
While the part is curing is a good time to clean up the gun. Before doing anything,
however, be sure to touch the emitter to the grounding clip to remove the residual
charge or you will be in for a spark plug-
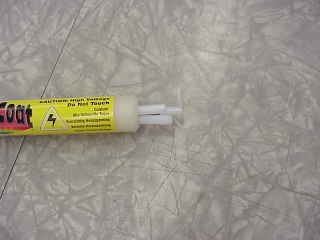
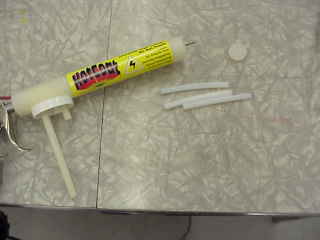
These photos show the gun after cleaning with compressed air. The one on the left shows the tree tubes being reinserted into the gun.
This photo shows the two deflectors. The one on the left is the one to use for most jobs and only comes with the high performance kit (one might be able to order the deflector separately but I didn't see it in the catalog). The one on the right is the one that comes in the basic system but is only used for hard to reach areas and inside corners.
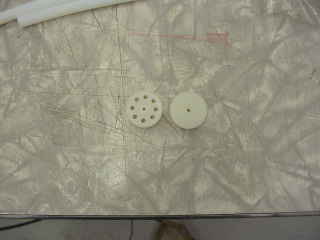
This is the first part I powder coated. I used gloss black that came with the system. It turned out perfect in my book.
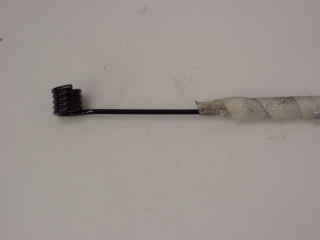
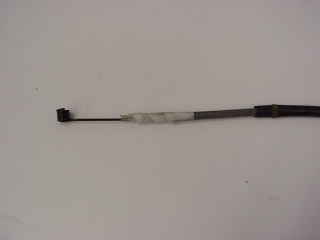
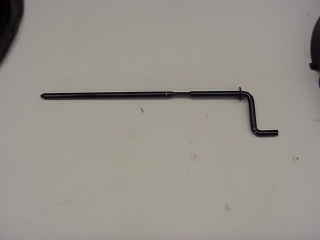
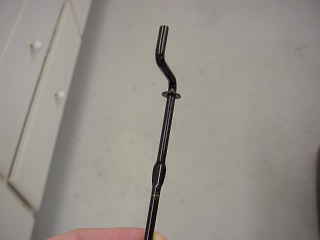
This part is the push/pull cable for the driver's under dash air vent. The internal portion of the cable was in great shape, but the exposed portion was rusty. I decided to try hot coating it and it worked great. I covered the entire cable with a plastic bag and taped it tightly shut only exposing the rusted end while I media blasted it (I didn't want any blasting media to get into the cable itself). After blasting, I removed the plastic bag and cleaned the bare metal well with acetone. I then used the high temp masking tape included with the deluxe system (some sort of fiberglass tape seen in both photos above) to seal off the cable from the cable housing and then powder coated the tip. I then stuck just the tip of the cable in the toaster oven and closed the door with the cable shut in the gap. It cured well and will be a great finish to this part.
These are just two more parts coated with gloss black. I did find that you need to be careful to get an even coat of powder on the full part. I found that the thicker the coat, the better the finish. It is a bit difficult to see thick and thin places during the coating process. The part on the right in the photo had an area on the back side (not seen when installed) that was a bit slim on powder. It cured okay and will protect well, but it doesn't look as good as the front does. I'll use more care to get a uniform coating in the future.
Overview
Powder
Coating
Discussion & Procedure
This is the end of the
Powder Coating Edition

Feel free to save this page to your computer for your personal use and future reference-
If you have comments or suggestions, email me at joe@joesfalcon.com