
© 1998-


Doors &
Windows
Part 4
Refurbishing the Side Window Glass & Frames
Quite often the frames of the side windows are dull, scratched, and in generally
bad shape. In order to restore these pieces the glass must be removed from the frames
and the frame pieces separated from each other so they can be individually restored
to like-
(Note: I had intended to cover removing the rear roll-
The Rear Roll-
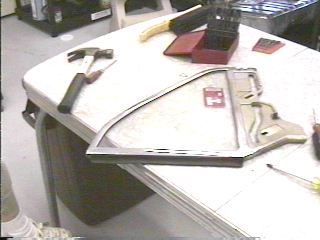
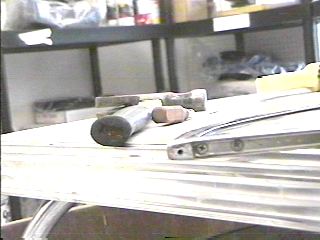
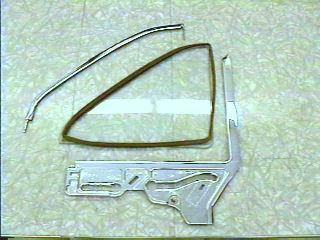
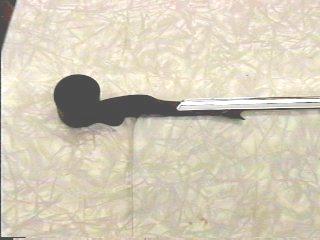
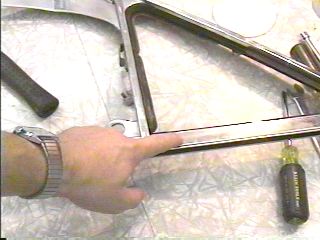
The left photo shows the frame still assembled after it has been removed from the
car. The view is looking at the "outside" of the driver's side window. The bottom
and front of this frame assembly is chromed pot metal. The top, curving back and
down with the glass is a stainless steel channel which the glass fits up into. There
is a rubber "U" channel gasket that fits all the way around the edges of the glass
and acts as a seal between the glass and the frames. The black strip on the front
of the assembly is the weather strip piece that seals between this rear roll-
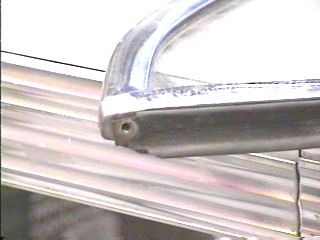
This weather strip piece is very stiff and bends as it is pried off the frame. Note in the left photo that two screws are now exposed which are shown in greater detail below.
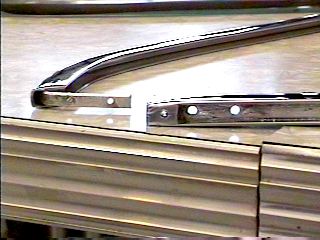
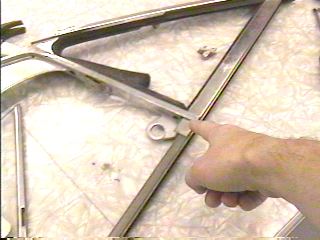
The top stainless frame is attached to the bottom frame with four screws. The left photo shows two screws at the top of the assembly that were hidden by the weather stripping. The right photo shows the frames apart after the screws and glass have been removed.
The left photo shows two screws at the lower rear of the frame. The right photo shows the frames apart after the screws and glass have been removed.
The next steps can be very difficult and require a great deal of patience. On my
windows, the rubber gasket between the glass and the frame was old, stiff, and stuck
very well to both the glass and the metal frames. Getting it unstuck and removing
the upper frame was a challenge. The upper stainless frame is somewhat fragile and
can be easily bent with rough handling. You need to avoid pulling hard on the stainless
frame, because if it does come loose of the gasket in the area you are pulling on
but it doesn't come loose on the other end, you will bend the frame piece and most
likely ruin it. I used a single edge razor blade and carefully slid it between the
glass and the rubber gasket to try and loosen it-
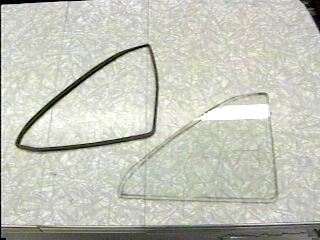
The left picture is the rear frame and glass apart. The right Shows the rear glass with the gasket removed.
The Front Roll-
This is the easiest window frame to disassemble. However, there still was great difficulty
separating the glass from the rubber gasket and frame without damaging the frame.
I left the bottom frame attached to the window. It was still in sound condition with
no visible signs of corrosion. And since it is not seen it requires no cosmetic restoration.
The rubber gasket was in fair condition. The right photo shows a close-
The material I chose to replace the rubber gaskets that were too far deteriorated
to reuse is called "Tuff Pack" tape. It is a rubbery material on a roll and is available
at most automotive glass places. It is not quite thick enough to replace the gasket
material with one layer (one and a half or two thicknesses are needed), and I doubt
it would provide as good a rain-
To provide a rain-
The Vent Window Stainless Steel Frame

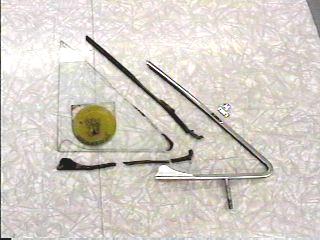
The left photo shows the vent window assembly together after being removed from the
vent frame. The right photo shows the assembly apart. Again, it was very difficult
to get the vent glass separated from the frame without distorting the fragile stainless
frame (almost an hour for each vent window). Note in the right photo that the gasket
has deteriorated to the point of being unable to be reused. The threaded shaft on
the bottom of the stainless frame inserts into the large pot metal vent frame and
attaches with a spring and a nut, with the spring between the frame and the nut.
The tightness of this nut compressing the spring is what determines the force needed
to open and close the vent window. Too tight and the window is difficult to open
and close, too loose and it will not stay open in the wind as the car is driving.
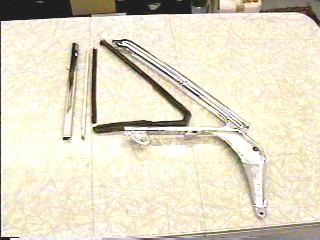
Note above the stainless frame in the right photo is the upper hinge piece. To remove
the vent window assembly from the large frame, remove the nut and spring from the
bottom, then remove the hinge from the top of the stainless frame by removing the
two screws. Then tilt the window away from the large frame. The stainless frame in
the photo on the right has been buffed & polished. The hinge piece has been re-
The Vent Frame Assembly
This is the complete vent frame after disassembly.
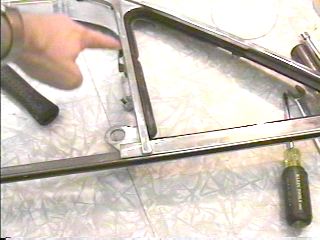
The large section of this assembly is chromed pot metal (what is being pointed to in the left photo). The piece being pointed to in the right photo is stainless steel and makes up the back edge of the frame for the vent window to seal against and provides an attractive cover to the rigid window run. It is riveted to the pot metal frame on the bottom, and screwed to the top with the screw that holds on the rubber bumper which acts as the front window up stop.
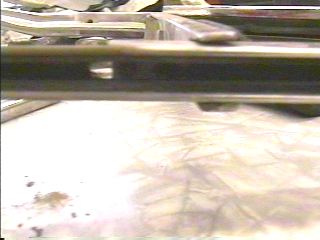
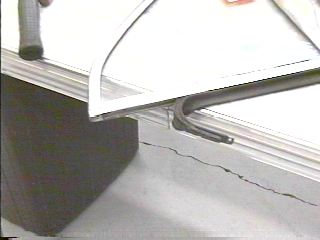
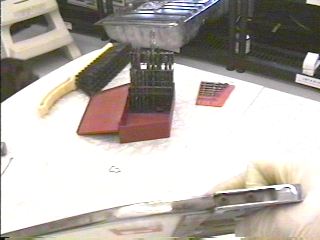
The left photo shows the location where the stainless piece is riveted to the pot
metal frame. Although the contrast prohibits seeing the actual rivets, the right
photo shows the exact location as viewed through the rigid window glass run (just
to the right of the hole). These rivets must be drilled out so the stainless piece
can be separated from the pot metal frame, so each can be restored in the way each
needs to be (i.e. the pot metal re-
This is a view of the rivet holes in the stainless back edge piece. The two at the
very bottom are where it rivets to the pot metal frame. The rest of the holes are
where the weather stripping is riveted to the stainless back edge piece. Again, these
rivets need to be drilled out, and the new weather stripping will need to be pop-
The Rigid Window Run
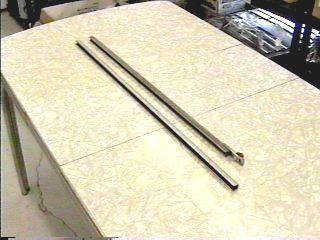
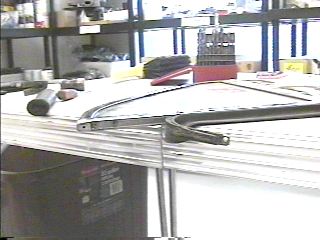
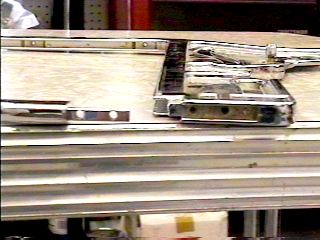
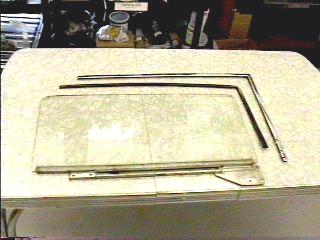
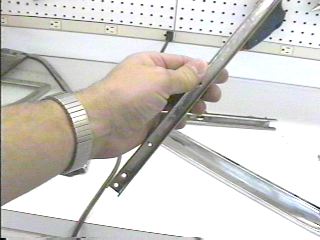
This shows the old rigid window run channel on the right, and the new piece on the left. In the catalog where I bought them, it stated that some modification is necessary. Note that the new one will need to be cut to proper length.
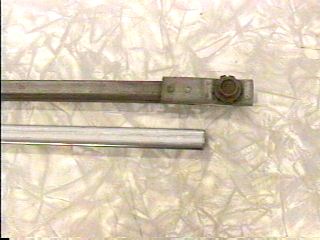
Riveted to the bottom of the old piece (top channel in photo) is a bracket for the adjusting bolt (as seen in part 1 of this section). These rivets will need to be drilled out and the bracket installed on the new channel by drilling new holes and pop riveting it in place.
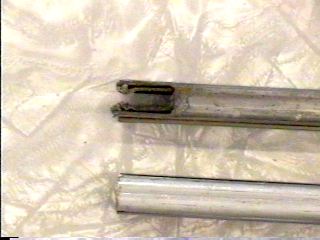
The tip of the new channel needs to have a slot cut in it to match the old one (top channel in photo). This allows for the rubber bumper piece to fit in at the top of the vent frame.
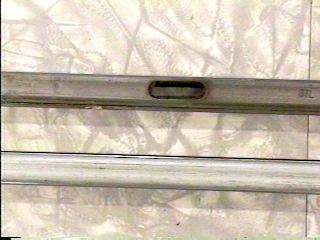
This hole in the old channel (top channel in photo) will need to be reproduced in the new channel. It is where the rivets for stainless back piece (mentioned above) go. While the channel is not riveted to the frame, the hole allows the channel to fit snug into the stainless back piece rather than being held out by the thickness of the heads of the rivets. This can be done by drilling several close holes the same size as the width of the hole in the old channel and then cleaning up with a file, Dremel tool, or something similar.
While the extent of these modifications may tend to induce one to think seriously about not replacing this piece, if you are restoring the car, replacing this piece will be well worth the time. One of the ways many people describe an old car is by saying that it has "drafty, rattly windows". This piece is the main window run in the doors and unless they have been replaced recently it is almost certain that the felt has deteriorated to the point that it will not hold the window tightly, and will let wind pass the seal, crating drafts and wind noise as the car is driven. If you want a quiet, well sealed car to be proud of, replace these pieces. Note also that at the time of writing this edition, these were the only rigid glass run sections I could locate (from one of our Falcon vendors). Since then, reproduction manufacturers may have reproduced this run exactly as original, so be sure to look around.
Polishing the Glass
Although I have never done this and as such have no photos of this process, several companies provide automotive glass polishing kits. Generally, the kits consists of one or two buffing wheels that fit in a drill, and one or two (or more) compounds that are applied to the wheel and then, using the drill, the window is buffed and polished to original shine. These products can also remove small scratches and small pits from the windshield, such as those caused by a defective windshield wiper. The kits do this by using the coarser polishing compound first (like sanding out a small dent in wood), followed by the finer one(s) that give the glass its final shine.
Note, however, that removing scratches and/or pits from glass is done by removing
some of the glass in the polishing process. However deep the scratch is is how much
glass needs to be removed on each side of the scratch. Even though, when finished,
the glass will be shinny as new, wherever more glass was removed to get out deeper
scratches you will see distortion when looking through the glass in that area. If
you could place a huge piece of graph paper or a similar grid on one side of the
glass and then look through the other side of the glass at the grid it would be easy
to see the distortion, and where the distortion was the worst-
This is the end of the Doors & Windows Edition
Part 4

Feel free to save this page to your computer for your personal use and future reference-
If you have comments or suggestions, email me at joe@joesfalcon.com